 Typical sensor chip sensitivity
DSLR cameras have a filter fitted in front of the sensor – to adjust the spectral sensitivity to match that of the eye. This compensates for the increased sensitivity of the sensor towards the red end of the spectrum. The filter also cuts out IR and UV, which can cause focussing issues.
Typical sensor chip sensitivity
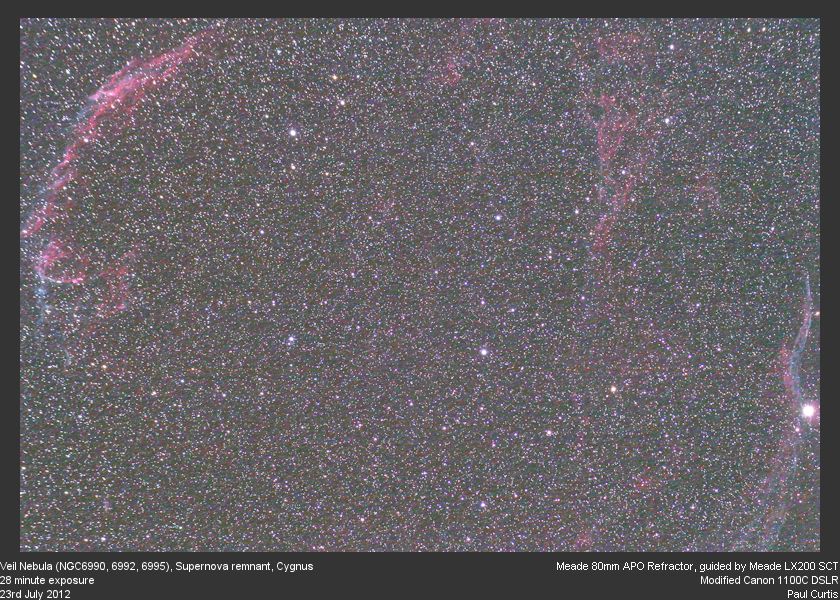
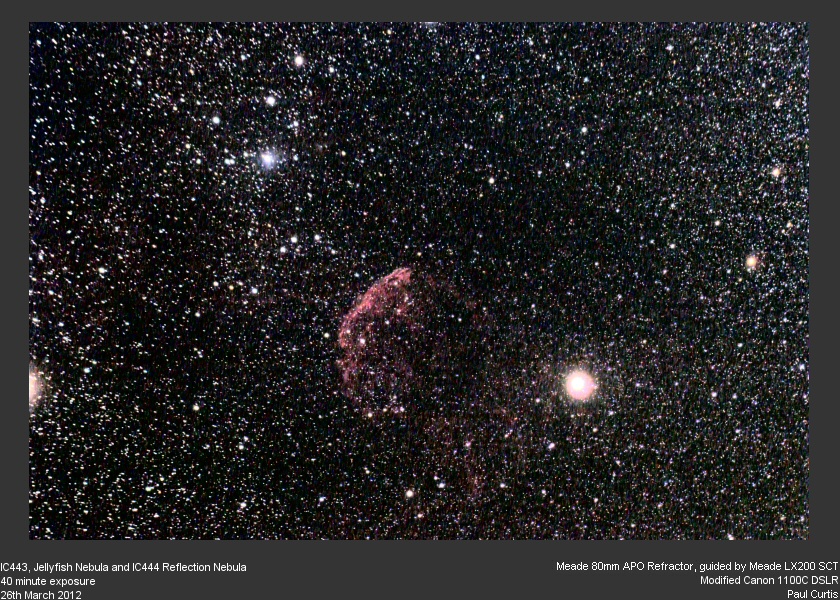
Many nebulae are brightest at hydrogen alpha frequencies
due to light emission at the specific frequency - 656nm. But this frequency is
heavily attenuated by the filter in front of the sensor. Thus H alpha emission
nebula will be difficult to image.
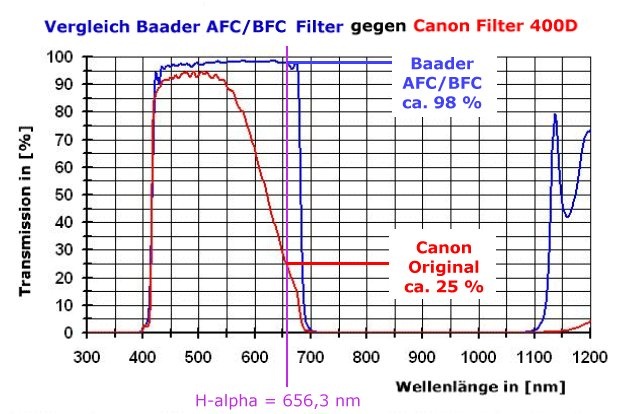
However, the filters can be removed or they can be replaced with a Baader filter
which screens out the UV and far IR, but lets the H alpha light through. It is
possible to remove the cut-off filter yourself and there are plenty of guides on
the net on how to do this. I wasn’t brave enough and paid ‘Astronomiser’
to modify a Canon 1100D for me !! Most Canon DSLRs from the 400D onwards
actually have two filters in front of the CCD, These dual filter cameras have
one filter that cuts out IR and UV and a second filter underneath that
compensates for red sensitivity. Leaving the IR/UV filter in place avoids issues
with focussing and helps protect the sensor. Thus only the red filter is
removed.
Issues for continued land usage
Having modified your DSLR, if you wish to use it for land usage then there are two issues to consider. Firstly with autofocus lenses, removal of the 0.8mm thick filter will alter the light path - this is down to the difference in the focal point when considering the refractive index of glass vs the refractive index of air. In practice this is very small and the difference is practically unnoticeable when taking everyday snaps. However, when using very 'fast' lenses or ones with a very short focal length you may need to manually focus. Without the cut-off filter in place, the white balance of the camera will be wrong. Removal of the this filter will cause the camera to be more sensitive to the red end of the spectrum and images thus look pink. This can be corrected quite easily using the custom white balance on the camera or by inserting an EOS clip-in filter.
Finally if you cant face modification, then Canon now sell a DSLR especially for astronomical use, the 60Da. This has the the filter ‘removed’ and is ready to use.But note it is expensive >Ł1100.
The benefit of camera modification is shown below. The first image is with an unmodified DSLR - this is a 36 minute exposure through 80mm refractor using a Canon 450D. The second one uses the same scope setup but with just a 20 minute exposure but using modified Canon 1100D. I am sure you will agree the difference is impressive !
 California Nebula - unmodified DSLR
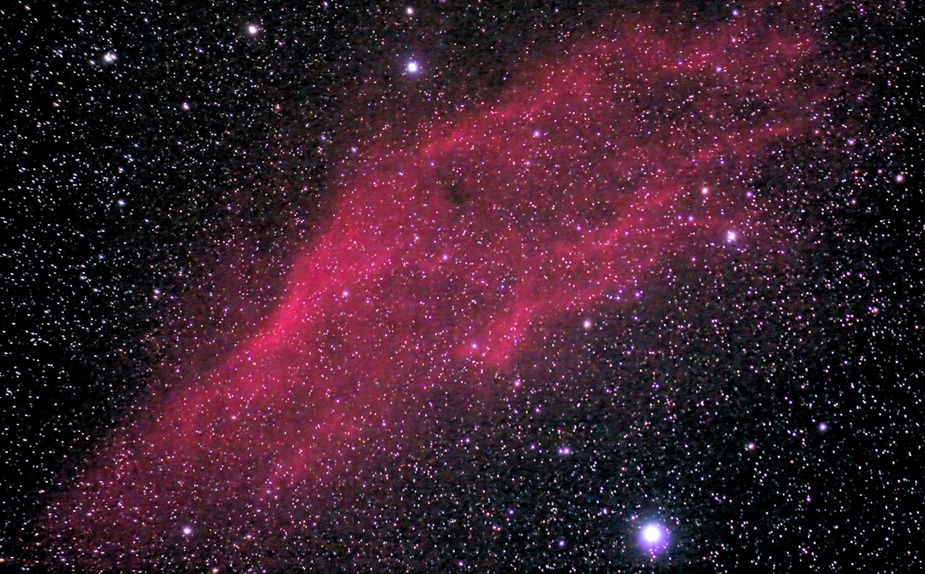 California Nebula - Modified DSLR
There are many image processing programmes available. One
of the most popular is
Adobe Photoshop,
but this is expensive, typically more than Ł400. However, a ‘lite’ version
called Photoshop Elements can be bought for around Ł70. The main competitor is
Corel Paint Shop Pro – this is available for
around Ł60 and in my opinion (for astronomical use) has more functionality than
Photoshop Elements. Many bespoke astronomical image processing programmes are
available – I like Astroart.
Personally I use Astroart to do initial processing and then finish off in Paint
Shop Pro. There are free image processing programmes on the net; one of these is
GIMP.